
A new way of controlling the Dynamixel servos is via the USB2AX V3.2, available from places like Trossen robotics and Seeed Studio for around $40USD. Note that stock levels seem to be all over the place.
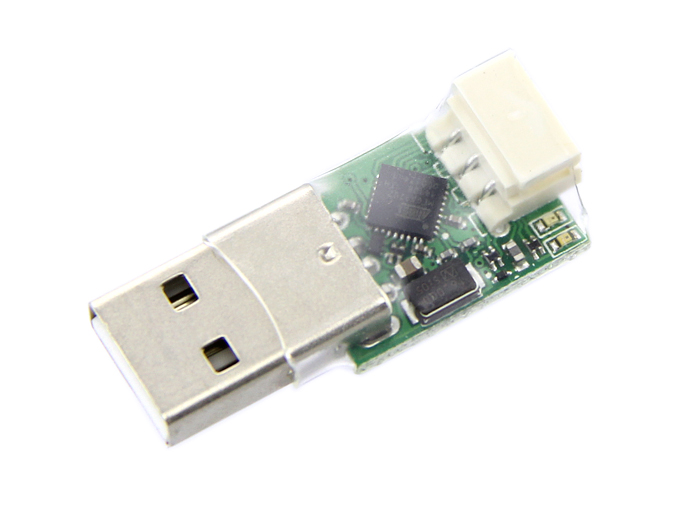
This has the advantage of being significantly smaller than the OpenCM and requires no soldering of connectors (eg. because they discontinued the OpenCM 9.04b) and for the serial port. It is now possible to build the robot with no soldering at all! (And just some screw terminals).
Here is a step-by-step on how to get this working with the Raspberry Pi. This was tested with a Raspberry Pi 3 but the instructions should still work on any Raspberry Pi with a recent version of Raspbian and Python 3. This is not a perfect instruction – it’s just the first thing I tried that worked so can be improved!
Download NOOBS from https://www.raspberrypi.org/downloads/ .
Follow instructions in downloaded NOOBS package ( INSTRUCTIONS-README.txt ) to write to SD card.
Boot Raspberry Pi with HDMI monitor, keyboard and mouse plugged in.
Install Raspbian (may take a while).
Look at the getting started example at http://www.xevelabs.com/doku.php?id=product:usb2ax:quickstart
Look at the instructions for Dynamixel SDK under Linux at http://www.xevelabs.com/doku.php?id=product:usb2ax:faq#qdynamixel_sdkhow_do_i_use_it_with_the_usb2ax
Look at Dynamixel Python library at https://pypi.python.org/pypi/pyax12/0.4.dev6 (there are a bunch of libraries, this seems to be the most recent).
Connect Raspberry Pi to network
Install PyAX12 library: (Note that “pip” by default on the Raspberry Pi will try to install it under Python 2 which won’t work.)
wget https://github.com/jeremiedecock/pyax12/archive/master.zip
unzip master.zip
cd pyax12-master
sudo python3 setup.py install
Note that the USB2AX shows up as /dev/ttyACM0, default baud rate is 1000000 (not 57600 as in the examples), default servo ID is 1. User needs to be a member of the dialout group (by default the Pi user is already part of this group). At this point it looks like it’s still necessary to run the scripts as root though (ie. “sudo python3 <program>”
Connect the USB2AX to the USB port, and connect up the servo and power.
Examples of Python programs that work (note that if typing these in, by default Raspbian uses a UK keyboard so the double quotes ” are Shift-2 rather than Shift-‘):
To scan for IDs:
from pyax12.connection import Connection
sc = Connection(port=”/dev/ttyACM0″, baudrate=1000000)
ids = sc.scan()
for id in ids:
print(id)
sc.close()
To print some info:
from pyax12.connection import Connection
sc = Connection(port=”/dev/ttyACM0″, baudrate=1000000)
id = 1
sc.pretty_print_control_table(id)
sc.close()
To move a servo:
from pyax12.connection import Connection
import time
sc = Connection(port=”/dev/ttyACM0″, baudrate=1000000)
id = 1
sc.goto(id, 0, speed=512, degrees=True)
time.sleep(1)
sc.goto(id, -45, speed=512, degrees=True)
sc.close()
Full documentation is at http://pyax-12.readthedocs.io/en/latest/